Without further ado, I proudly present you Part 3 of my first painting guide.
If you have missed Part 1, click here.
If you have missed Part 2, click here.
If you have missed Part 1, click here.
If you have missed Part 2, click here.
11. Weathering

Runefang Steel was used to add some small scratches to the armoured parts and metals.
Nihilakh Oxide was stippled on the brass parts. To decrease the intensity Black Wash, diluted with water, was stippled over these areas again.
To give the metals a more worn look I painted Mournfang Brown in some edges and recess areas on the armour, chains, etc. and 'washed' it with Typhus Corrossion. Actually I wanted to add some Ryza Rust as well to create a rust effect inspired by the Kraut Scientist again. But then I decided not to do that.


11. Object Source Lighting


I mixed the beautiful Dark Blue with a lot of Lahmian Medium to create a very low opacity. The I used this like a glaze (because I dont have a any glazes) and painted layer, for layer, for layer and so on. Till I was pleased with the result. Thankfully I found this simple technique on the amazing YouTube channel of Sorastro's Painting. I also added a bit more brightness to the flames with a mix of White and Sky Blue.


12. Wooden parts

I forgot to highlight the wooden parts. This was now done with a ~50/50 mix of Chocolate Brown and Bonewhite.


13. Skulls

No words needed, or?
14. Blood
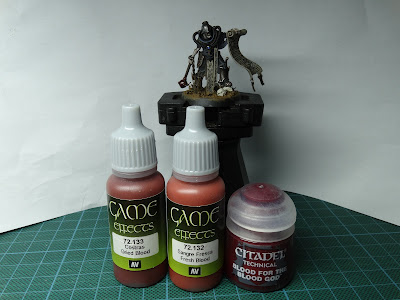
These colours were stippled one by one on Rhavons mace. Dried Blood, Fresh Blood and finally Blood for the Blood God.


I mixed the beautiful Dark Blue with a lot of Lahmian Medium to create a very low opacity. The I used this like a glaze (because I dont have a any glazes) and painted layer, for layer, for layer and so on. Till I was pleased with the result. Thankfully I found this simple technique on the amazing YouTube channel of Sorastro's Painting. I also added a bit more brightness to the flames with a mix of White and Sky Blue.


I forgot to highlight the wooden parts. This was now done with a ~50/50 mix of Chocolate Brown and Bonewhite.


13. Skulls

No words needed, or?
14. Blood

These colours were stippled one by one on Rhavons mace. Dried Blood, Fresh Blood and finally Blood for the Blood God.


Now I just have to finish the bird, complete their bases and call them done. This you'll see in Part IV. I'm really proud of my progress so far and that I successfully managed to try out a lot of new techniques on these models.
Continue with Part 4 of this painting guide.
As always, thank you very much for your visit, feel welcome to comment and stay tuned!
.Continue with Part 4 of this painting guide.
As always, thank you very much for your visit, feel welcome to comment and stay tuned!
No comments:
Post a Comment