Tuesday, February 18, 2020

Bonereaper Challenge

I proudly present you my contribution for the very cool Bonereaper Challenge from Between the Bolter and Me. This challenge was the perfect opportunity to add a new model to my Drukhari Army. A model I hadn't thought of without this challenge - another Haemonculus.


I have looked forward to this project since I first heard of it. Adam Wier did such a fantastic job with his conversion. Masterclass sculpting and I love how otherworldly his Eldar looks. A tall and slender Xenos, just pure awesomeness! Inspired by this I was aiming to get something similar but that hasn't worked well.

After I opend the box of the Bonereaper Mortek Guard my first thought was: 'Damn, these are tiny and so delicate!'. I cutted two models into pieces and tried to combine various bits with different arms and leg parts of all different kits like eldar or tyranids. Due to the fact that my green stuff skills are rather awkward, I started to rethink the possibilitys that this bonereaper kit offered for my style of converting. The head was the first thing I was sure about. Upper half mortek guard and the lower half is a modified head from the Drukhari Helions. I contiued to play around with combinations of bits and finally had a new plan.   

After I had found a good starting point I tried to get the Bonereaper bitz into the game. They were used for the Head, the belly middelpart with loincloth, on his back and for the upper arms. I also used some stuff similar to my other models to get a coherent look. I used the whips of the Daughters of Khaine and added blades and an injector. Inspired by the Codex artwork I created a strange drukhari artifact, which hovers in his hand. A few more details like chains and spikes and I was done and really pleased with the result. The paintjob was done in the same way as on my other Drukhari and was a lot of fun.


 Thank you very much for your interest and I hope you enjoy this model as much as I do. Stay tuned!

Thursday, February 13, 2020

Namorra Prime Terrain - Tutorial Part2


As promised, here is the second part of my terrain tutorial for the Namorra Prime Board.
In case you've missed the the first part of the tutorial, just click here.

After the board is completly cured we can continue with the next phase - painting and adding further details. I really tried to achive a great result in a rather easy and replicable way.

The next step is to prime the board. I use black, grey and white spray can primer to create a zenithal highlight and pre-colour the rock areas.
In case you wanted to create a moon surface you're done! ;-P
Otherwise you need to add some colour to the surface. I use a umber tone acrylic paint. This colour is heavily diluted with water and brushed on the surface like a wash. I also stipple this tone in random areas on the rock sections. Just to create a more interesting and natural look.

Then I use a diluted black paint and washed the rocks. I do this to darken them down a bit and get a bit more contrast in the recesses.

After the diluted paints have dried, I use the pure and undiluted umber tone to drybush the surface.

Next step is to drybrush the rocks. I use stone grey from Vallejo for this.

The bushes are painted with Vallejo's Flat Earth and also get a highlight / drybrush with a 
mix of Flat Earth and white (approx. 50/50).

Next step is to add some static grass. This is a step I had to compromise between good looking and playability. I used 3mm grass, but I guess a grass with longer fibers would look even better. 

I stippled on diluted PVA glue in the areas I want to have the grass, mixed two sorts and applied it with a tiny static grass applicator. I did this part after part and removed the left over grass with a vacuum cleaner. You can use a sock or stockings, put over the cleaning head, to prevent you loose all the left over grass

Now it is time to add some moss. Just mix PVA glue, flock and water and apply it with a brush. It will appear a lot darker when it has dried.

To add a bit more interest I used crushed fallen leaves to represent fallen leaves. Clever, eh?
Just sprinkle them on the board's surface. They will be fixed in the next step.

The last addition is a bit of foliage. I just created the desired shape and placed it with PVA glue on the desired spot.

Finally the whole board is sealed with the 99%-Alcohol and the PVA spray.

So far, so good! As mentioned in the first part, I think there is a lot space for improvements and a lot I still have to learn. I watched a lot of tutorials but in the fact I have to do these things on my own and learn from success and failure. There are a lot of materials I havn't used before, like the cork bark for example, and it is the best way to just try them out. Even when it fails you learn how to do better.


In the meantime of the last drying process I created a 60x40mm backdrop to get some moody pictures. I first thought about printing stuff, but I think that a real painting would be much more what I had in mind. It is my first acrylic painting and I am really happy about the result. It took approx. 30min and it is mostly wet in wet colour smashing, smoothing transitions and stippling. Thank you YouTube tutorials!


Thank you very much for your visit and stay tuned for the next terrain update soon!

Thursday, February 6, 2020

Namorra Prime Terrain - Tutorial Part1


The last weeks I spent my hobby time to create more terrain for the upcoming Ondroma event.
Last year I made the start with this project and build the first two simple tiles. Now it is time to continue this big project!

The Namorra Prime board will have the size of four two-player Kill Team maps, separated in 8 tiles and I tried to make the layout as modular as possible. Each tile is 60 x 40mm and build on a 12mm thick wooden board.

Building good looking terrain is not the hardest part. Making it good looking and actually playable was the hardest part for me. You need to find the right mix between a good looking realism and the purpose the board is build for - tabletop wargames. That means, you have to make the surfaces and objects rather flat and keep base sizes and possible movement ways in mind.

Without further ado, let us start with the tutorial or my how to.

The first step is to get some rough shapes. Just cut some hard foam in pieces and glue them on the wooden plate. I used 'no more nails' and PVA glue for this step.
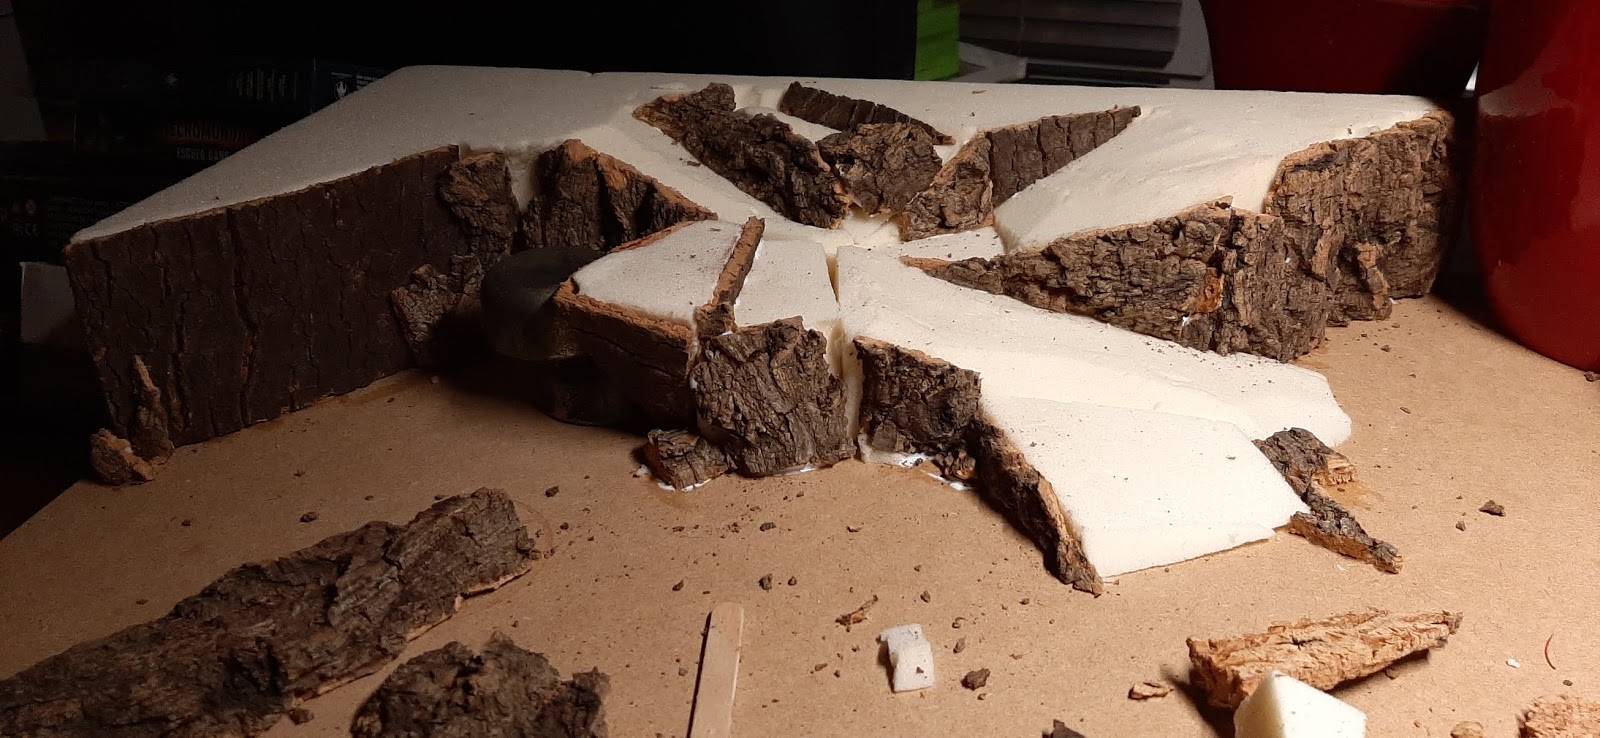
To get the desired rock / stone look, I coverd the shapes with cork bark and continued to add more forms and define the shapes. 
Cork bark is available in different shapes and patterns. You can easily cut or brake it. I also used a knive to smoothen the backside and glued it with PVA to the foam.
I also used a 4mm cork plate to cover parts of the surface. This should underline the illusion of a rocky surface. Glued with PVA.
After this structure had dried, I wanted to cover the remaining gaps and fill some holes.
 First I used tissue paper, soaked with water diluted PVA.
This worked quite well, but I needed so much material and glue that I looked for an alternative and found a rock compound. Cheap and easy to use!
 Afterwards I used a modeling compound to create a nice surface and smooth transitions.
 When the compound was dry again, I started to add some details like small rocks and debris.
I used sand, fine and medium cork grit to achieve this. Just place a mix of these materials on the desired area.
To fix these areas I used a 50/50 mix of PVA and Water. First I soaked the Area with 99% Iso alcohol, and then soaked it again with the PVA glue. The Alcohol helps to breack the surface tension and I highly recommend it before adding the glue on top. 
After another drying time, I started to cover the whole surface with sand. I used that 50/50 mix of PVA and water and brushed it on the surface. I worked in small areas and did it part after part.
A very usefull tool is a sheet of paper. It helps you to reach areas without turning the complete board on the side.
 The sand was sealed with alcohol and a PVA mix. 3 parts water, 1 part water and 1 or 2 drops of dish soap (which also helps to break the surface tension). Soak the complete board and let it dry.
The last step before priming: Add a few bushes.
I add the bushes now, because I want to paint them later. If you want a green vegetation you con ignore this step ;-)
 I used superglue (gel) to place some bushes.
 Then I used alcohol and fluid superglue to seal the bushes.
Building phase completed!

It is my first big terrain project, so there surly is a lot space for improvements.I hope this tutorial shows you the process of building this board in an easy and understandable way.
I really tried to make it easy, effective and replicable for me.
The next part will hopefully be released next week and it will show the needed steps to make the board look like these two already finished tiles:


Thank you very much for your visit and stay tuned. A lot more updates and pictures will follow  soon!