Friday, March 29, 2019

Tzeentch Warband

CULT OF THE CHANGING DESTINY
-Servants of Tzeentch-


Madhezia Ra'kazor Rogue Psyker


L'zeeha Whisperbird


Rhavon Keeper of Knowledge


K'zia The Witch


If you have missed the painting guide click here for:

As always, thank you very much for your visit, feel welcome to comment and stay tuned!

Tzeentch Warband - Part V

As promised, here is the final Part 4 of my first painting guide.

If you have missed Part 1, click here.
If you have missed Part 2, click here.
If you have missed Part 3, click here.


15. Bases - Base Colours


I used Heavy Brown for the stones and the undergrowth. Then I mixed it with Medium Grey in a 50/50 ratio to increase the brightness a bit. I also washed the skulls with Seraphon Sepia.


16. Bases - Washes


Athonian Camoshade was used to Wash the Undergrowth. Agrax Earthshade for the skulls eye sockets and the rest of the surface.


17. Bases - Drybrush


I used the mix of Heavy Brown / Middle Grey again for a light Drybrush.


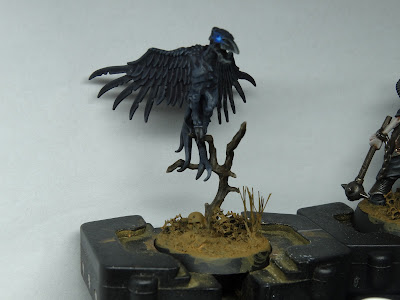
18. Bases - Familiar


I highlighted the little Familiar with Luftwaffe Uniform and painted its eyes in the glowing blue.


19. Bases - Skulls


The skulls received a light highlight with Bonewhite.


With that done the painting is completed.


20. Pigments


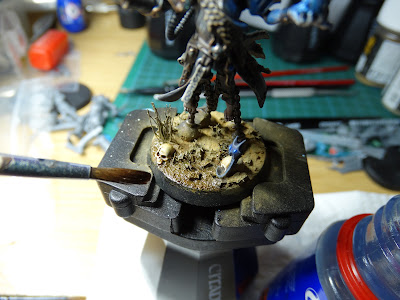
As a finishing touch, I added some Pigments on the bases surface. I applied them dry straight from the pot. First a layer of Sierra Natural the some spots with Light Sierra.


Afterwards I mixed and spread them with a brush and removed the excess.


To fix the pigments I used a Pigment Fixer. Just take a brush (I recommend a bigger one) and carefully tip on a point of the base. The capillary action will do the rest :-). Repeat this till the whole surface looks wet.


Just let it dry completely and paint the rim of the bases in a desired colour.


If you are interested in my tools, equipment or brushes plesae take a look on the following picture. But you wont find anything special ;-)
 

1. My self-build wet palette
2. DaVinci Drybrush
3. Revell Size 3 for Shades and the Pigment Fixer
4. Revell Size 1 for Shades
5. Citadel Layer M for the Base Colours
6. Citadel Layer S for everthing else
7. Old Citadel Layer M for the Dry Pigments

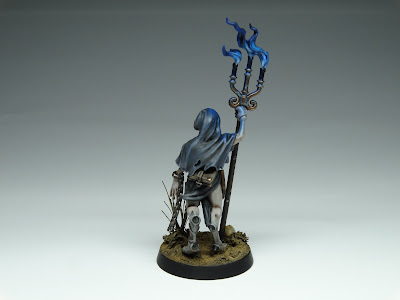
I can't finish this painting guide without a picture of the finished work. So, here is the 1st wave of my new Warband in all its glory. There will be a separat post with more photos soon. 


As always, thank you very much for your visit, feel welcome to comment and stay tuned!
.

Thursday, March 28, 2019

Tzeentch Warband - Part IV

Without further ado, I proudly present you Part 3 of my first painting guide.

If you have missed Part 1, click here.
If you have missed Part 2, click here.

11. Weathering


Runefang Steel was used to add some small scratches to the armoured parts and metals.
Nihilakh Oxide was stippled on the brass parts. To decrease the intensity Black Wash, diluted with water, was stippled over these areas again.
To give the metals a more worn look I painted Mournfang Brown in some edges and recess areas on the armour, chains, etc. and 'washed' it with Typhus Corrossion. Actually I wanted to add some Ryza Rust as well to create a rust effect inspired by the Kraut Scientist again. But then I decided not to do that.


11. Object Source Lighting


I mixed the beautiful Dark Blue with a lot of Lahmian Medium to create a very low opacity. The I used this like a glaze (because I dont have a any glazes) and painted layer, for layer, for layer and so on. Till I was pleased with the result. Thankfully I found this simple technique on the amazing YouTube channel of Sorastro's Painting. I also added a bit more brightness to the flames with a mix of White and Sky Blue.


12. Wooden parts


I forgot to highlight the wooden parts. This was now done with a ~50/50 mix of Chocolate Brown and Bonewhite.


13. Skulls


No words needed, or?


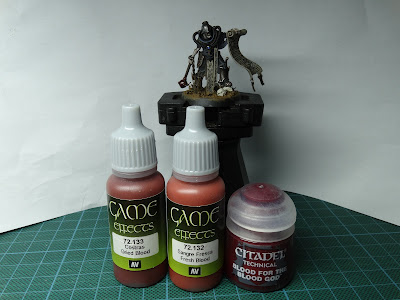
14. Blood
 

 These colours were stippled one by one on Rhavons mace. Dried Blood, Fresh Blood and finally Blood for the Blood God.


Now I just have to finish the bird, complete their bases and call them done. This you'll see in Part IV.  I'm really proud of my progress so far and that I successfully managed to try out a lot of new techniques on these models.

 Continue with Part 4 of this painting guide.

As always, thank you very much for your visit, feel welcome to comment and stay tuned!
.