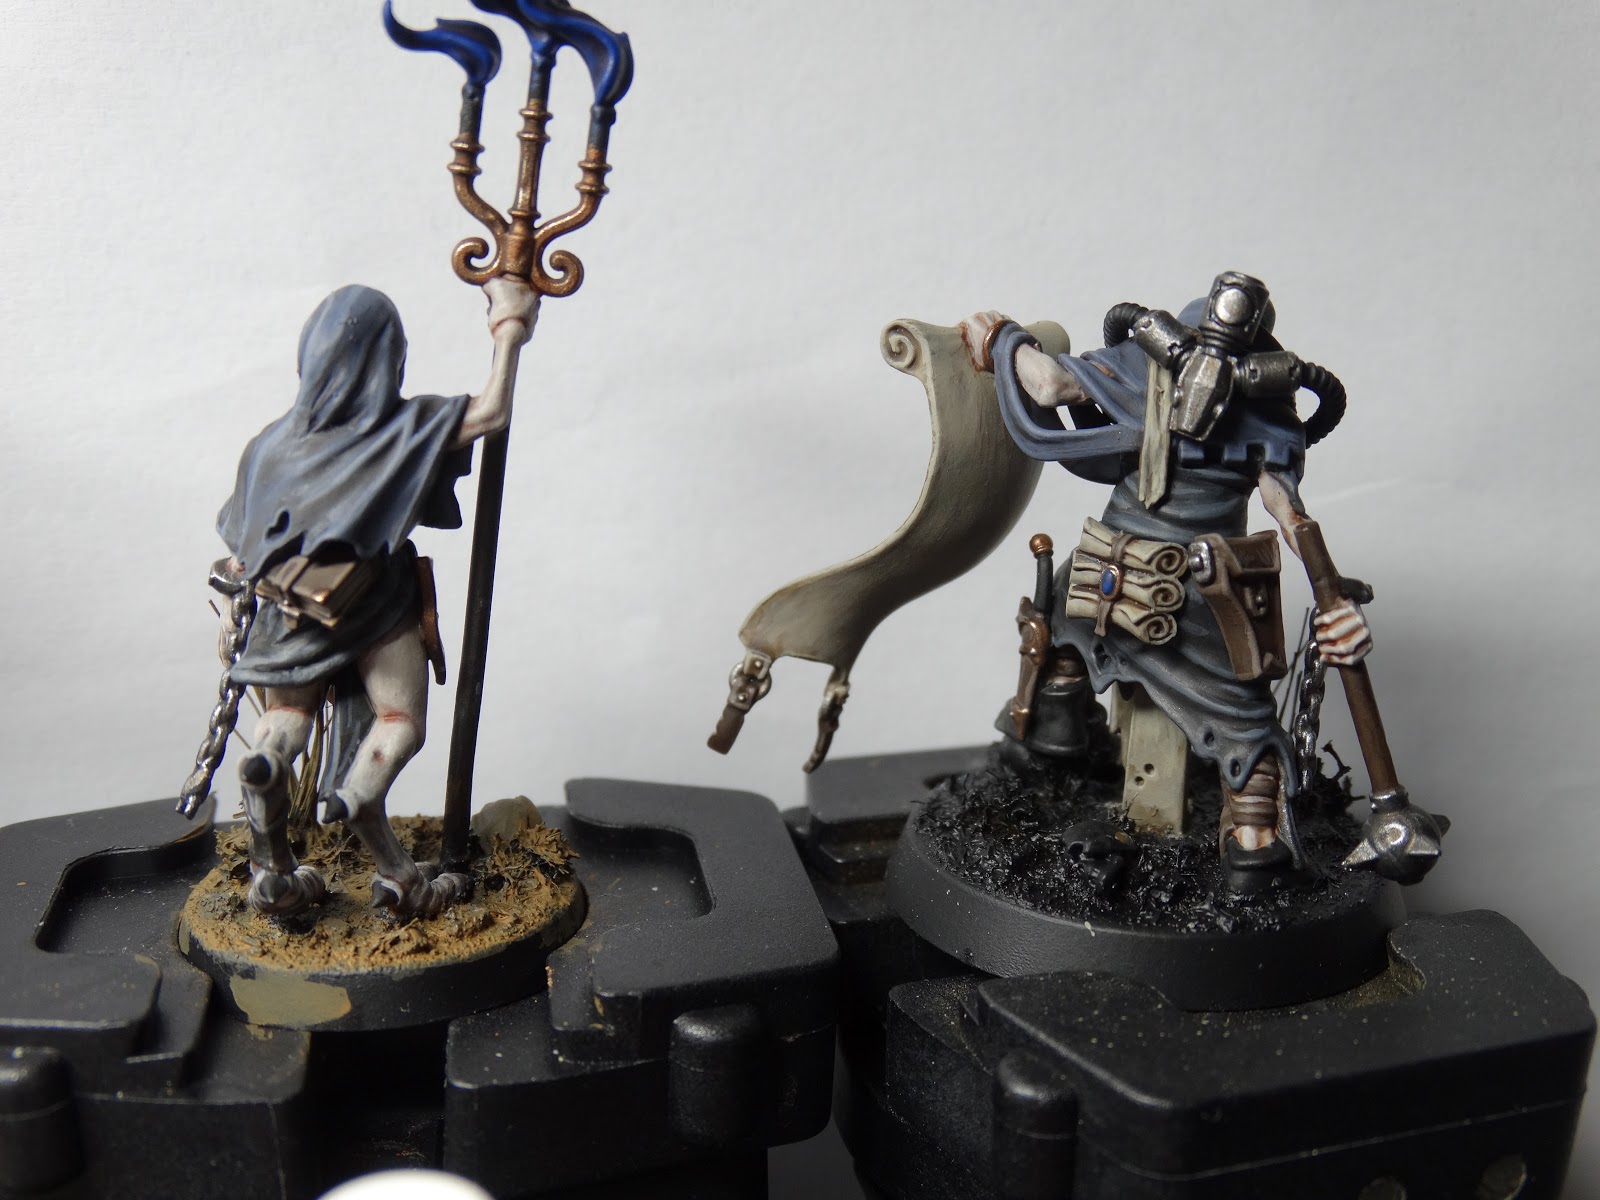
During the last days I've created two new servants of Tzeentch for the warband.
Rhavon
A Cawdor Ganger with a
Nighthaunt Chainrasp head was the foundation for this model. I added the scroll
from the Kairic Acolytes Kit. The backpack is a Necron Praetorian hand
with added green stuff tubes. His mace is also taken from a Chainrasp
model.
For the Bases I decided to do something similar as I did on my
TechPriest.
First
I cutted a plastic sprue to random tiny pieces and glued them on the
bases to represtent stones or debris. I also added some skulls to each
base to represent... ok, it's 40K that should be reason enough ;P .
After that I painted the whole base with a texture paint from Vallejo
and let it dry. Then I took some long static grass fibres and glued them
onto the surface with the texture paint and let it dry again.
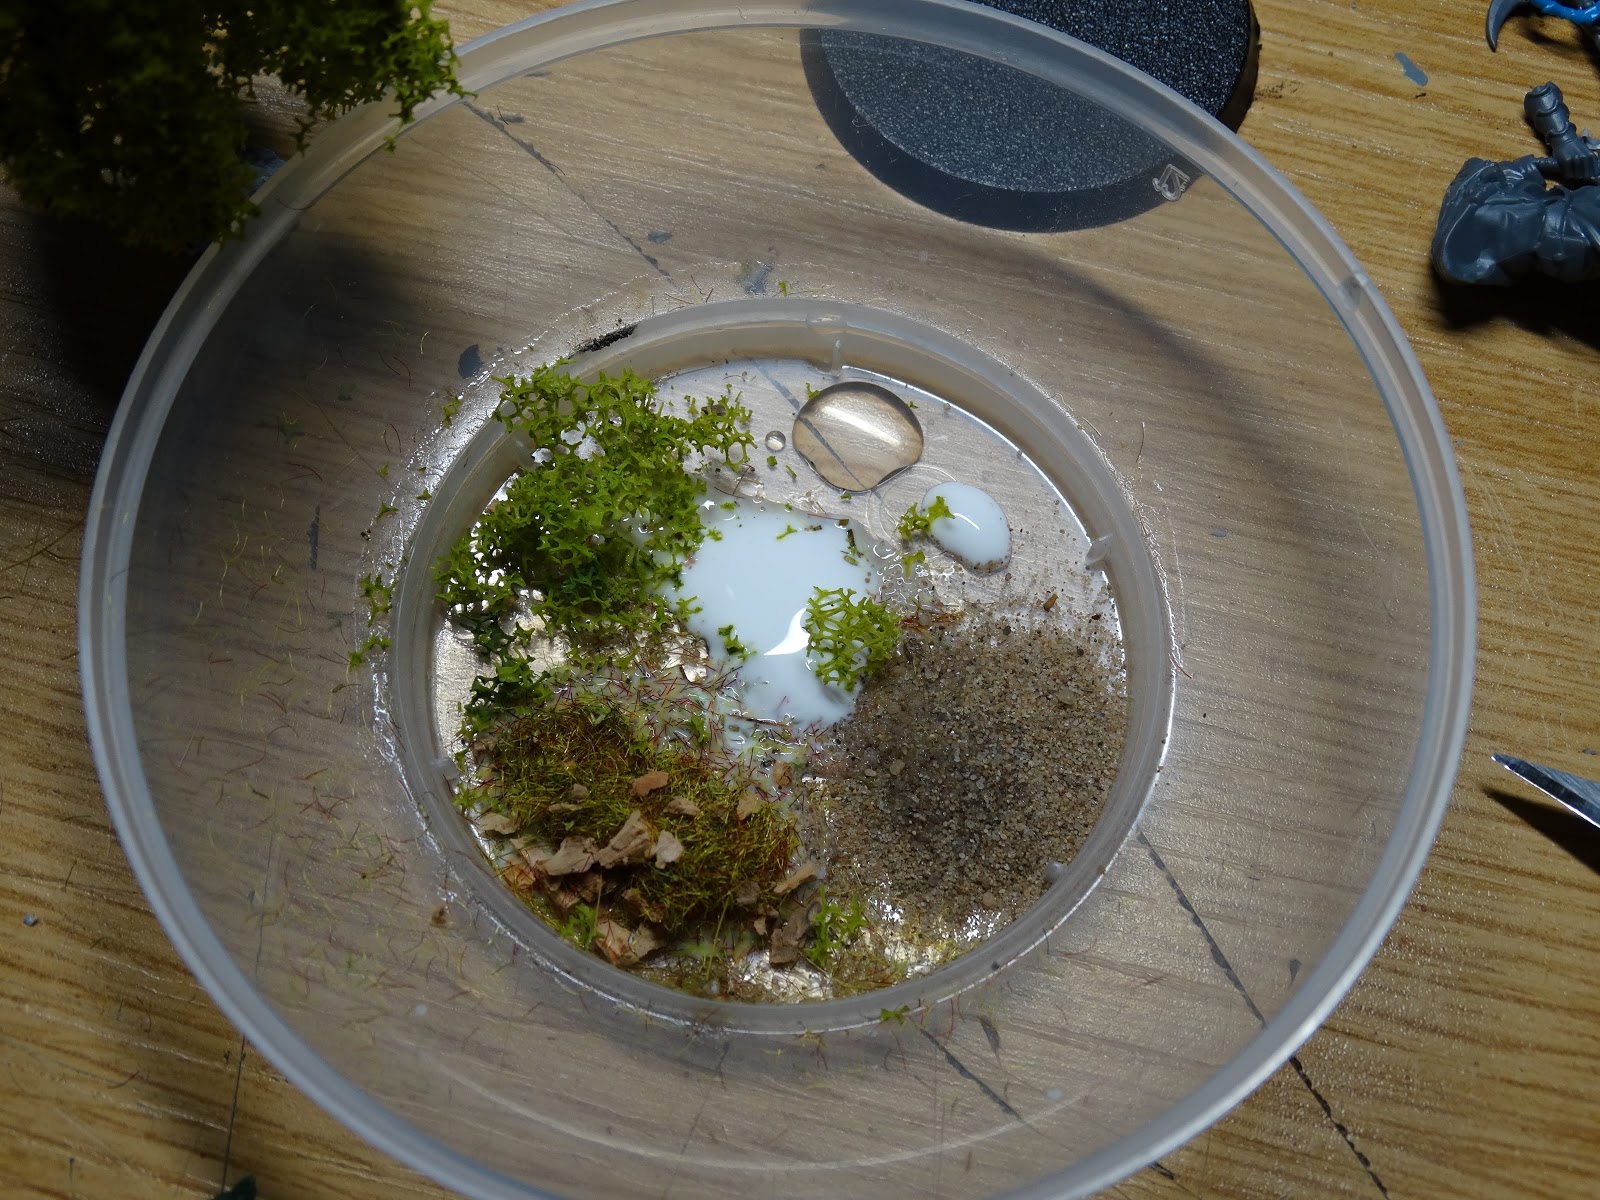
For the next layer I mixed fine sand, static grass with cork 'stones', flock from a model tree, PVA glue and water.
I placed it on the desired spots and let it dry again, before I added watered down PVA glue again.
Afterwards I primed the models with Chaos Black.
K'zia
For a female member I choose a Daemonette. I think the
bird-like legs are well fitting for a tzeentchian character. Also, I
wanted to use the left-over candlestick from the Chainrasp (will count as a flamethrower, or so) and continued to use a Chainrasp arm on the other hand. I placed some smaller bits like the symbols on her front.
Then I took green stuff and started to (or tried to) create a hooded cult robe and cover her left side.
I also covered her tiny Daemonette butt.
And sculpted a hood, which worked pretty well
Then I added a few more details, repeated the basing process and primed her.
It fells like I made some satisfying progress and I really like the characters I've created so far.
On the other hand I have some creative struggle with my Changewalkers, but that's another story for another time.
But for now we're not finished yet ;-)
I also started to paint the minis and the desired colour scheme was heavily influenced by the following artwork.
As well as the amazing Sorcerer of my anytime muse, the amazing one and only
KrautScientist!
I wanted a bit more desaturated, grim dark look with a pop out colour for the blue magical effects.
I try to make my first painting tutorial, or at least document the steps and the used colours.
Without further ado, let's do this!
1. Apply all basecolours
Luftwaffe Uniform (cloth / hoods)
Black Grey (cloth / cloak / robes, bird)
Black (cables / shoes / claws)
Gunmetal (metal)
Leadbelcher (metal details)
Balthazar Gold (brass parts)
Rakarth Flesh (flesh)
Chocolate Brown (fur / straps)
Leather Brown (holsters / belts / straps)
Dark Blue (flames / gemstones)
Medium Grey (scrolls / skulls)
The bird got an additional drybrush with Luftwaffe Uniform and London Grey.
I also painted a small line with green ochre on the hoods.
2. Darken it down with different shades
I used Agrax Earthshade for the entire model, except:
Reikland Fleshshade for the skin areas with a second partial layer with Drakenhof Nightshade
(ie mouth, eyes, daemonic patrs, etc).
The flames and the bird were washed completly with Drakenhof Nightshade.
C.Crimson was only used for the runes on the scroll.
3. Highlight the skin
Rakarth Flesh was used for the first layer, Pallid Wych Flesh for highlights.
I used a 3:1 mix of Lahmian Medium and Rakarth Flesh, to create smoother transitions.
4. Highlight the cloths
The base-colours were mixed with grey to lighten them up.
At this point I painted a thin line with grey on the cloak.
5. Drybrush the Psykers fur
6. Details - Eyes and Teeth
The teeth and eyes were painted with Bonewhite.
The eyes got a neat White highlight and then I accidantly shaded them with Agrax Earthshade instead of Seraphone Sepia. Anyway, I applied the Sepia shade on top, which creates the desired yellowish look. A Bonewhite dot finished this step.
The same colours were used to paint the tiny bird skulls
7. The forgotten step ;-P
I just realize that I forgot to take some pictures of the metal highlight step.
This was done with leadbelcher.
Continue with
Part 2 of this painting guide.
As always, thank you very much for your visit, feel welcome to comment and stay tuned!